 Reviews



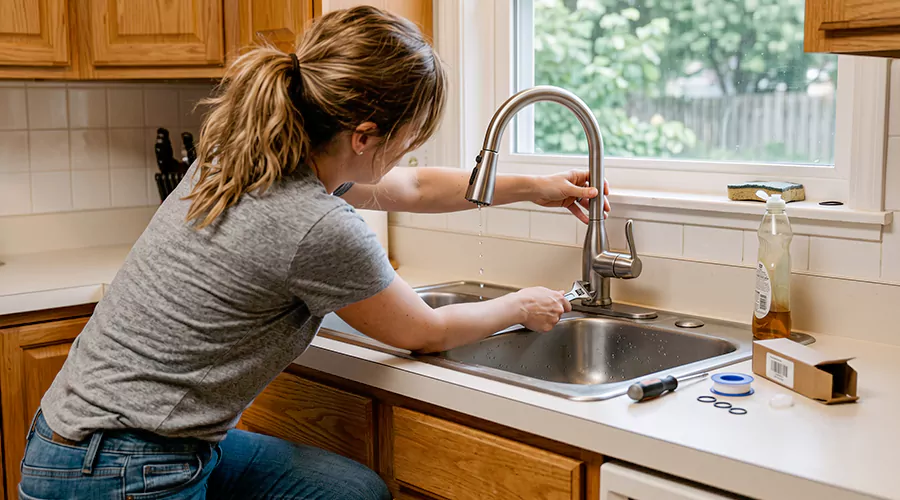
You can often fix a leaky faucet by replacing its worn washer or matching cartridge after shutting off the water supply. Many straightforward repairs take approximately 15–30 minutes once the correct parts are available. Professional leaky faucet repair costs about $100–$400 in the United States according to July 2026 data. Faucet installation can also be considered when replacing an outdated or damaged faucet with a new fixture.
The repair method depends on the faucet design.
A compression faucet uses different sealing components from a modern cartridge faucet. Identifying the mechanism before buying replacement parts prevents incorrect repairs and unnecessary disassembly.
What Tools Do You Need to Fix a Leaky Faucet?
Most accessible faucet repairs require common hand tools. The exact equipment depends on the manufacturer and whether the faucet uses a removable cartridge or another internal valve mechanism.
Useful tools include:
- A suitable screwdriver.
- An Allen wrench when the handle uses a set screw.
- An adjustable wrench.
- Soft cloths to protect finished surfaces.
- A container for small components.
- The correct replacement washer or cartridge.
- Manufacturer-approved faucet lubricant when required.
A cartridge removal tool may be necessary for some designs.
Before buying parts, identify the faucet manufacturer and model if possible.
The replacement component must match the actual valve design rather than the faucet's appearance alone.
How Can You Identify Your Faucet Type?
Faucets use several different internal mechanisms. The correct repair depends on determining which one is installed.
| Faucet Type | Common Internal Component | Typical Repair |
|---|---|---|
| Compression faucet | Rubber washer and valve seat | Replace damaged sealing parts |
| Cartridge faucet | Replaceable cartridge | Replace the matching cartridge |
| Ball faucet | Ball valve with seats and springs | Replace worn components |
| Ceramic-disc faucet | Ceramic-disc assembly | Follow model-specific repair instructions |
A two-handle faucet is not necessarily a compression faucet. Many modern two-handle designs use cartridges.
Check the manufacturer's model information before opening the valve.
A visible model label or existing parts diagram can help identify the correct components.
What Should You Do Before Disassembling the Faucet?
The water supply must be shut off before removing internal faucet components. Opening a pressurized valve can release water into the surrounding area.
Follow this preparation procedure:
- Clear the area around the sink.
- Locate the faucet's supply shutoff valves.
- Close the valves according to their design.
- Open the faucet to relieve trapped pressure.
- Confirm that water has stopped flowing.
- Cover the sink drain.
- Place a towel beneath the work area.
- Photograph the faucet before disassembly.
Covering the drain prevents small screws or washers from disappearing into the plumbing.
An established iFixit repair guide begins with shutting off both supply valves and confirming that water no longer flows.
Do not force a damaged shutoff valve.
How Do You Fix a Leaky Cartridge Faucet?
A cartridge faucet controls water through a replaceable internal component. When the cartridge's seals become damaged, water may continue dripping after the handle is closed.
The repair procedure varies by manufacturer.
A general sequence includes:
- Shut off the water supply.
- Open the faucet to release pressure.
- Cover the drain.
- Remove the decorative handle cap if present.
- Loosen the retaining screw.
- Remove the faucet handle.
- Identify the cartridge-retaining mechanism.
- Remove the cartridge according to manufacturer instructions.
- Inspect the valve body for visible debris.
- Install the exact matching replacement cartridge.
- Reassemble the faucet.
- Restore the water supply gradually.
Pay attention to cartridge orientation.
An incorrectly installed cartridge may affect temperature control or prevent the faucet from operating normally.
Do not force a cartridge that appears incompatible.
How Do You Fix a Leaky Compression Faucet?
Compression faucets use a stem that presses a washer against a valve seat. Normal use can flatten or damage the washer over time.
Replacing the worn washer often corrects an ordinary spout drip.
Follow the appropriate manufacturer instructions. The general process is:
- Shut off the water supply.
- Relieve pressure through the faucet.
- Remove the handle.
- Access the faucet stem.
- Remove the stem assembly.
- Inspect the washer.
- Check the valve seat for visible damage.
- Replace the defective washer with a matching part.
- Reassemble the valve.
- Restore water and test.
A damaged valve seat can cause a new washer to fail prematurely.
Inspect the seat rather than assuming the washer is the only component that requires attention.
How Do You Repair a Faucet That Leaks Around the Handle?
Water appearing around the handle may involve an internal cartridge seal or another component near the valve stem.
The repair depends on the faucet's internal design.
Start with a dry-surface test to confirm that the water actually begins near the handle.
Then identify the model and inspect the appropriate sealing component.
A cartridge-based faucet may require cartridge replacement. Some other designs use replaceable O-rings or packing components.
Do not tighten the handle excessively in an attempt to stop the leak.
A failed internal seal requires the appropriate replacement component rather than additional handle pressure.
How Do You Replace a Worn O-Ring?
O-rings create watertight seals around certain faucet components. Their location and removal method vary by model.
An O-ring replacement should use the correct dimensions and material.
General precautions include:
- Shut off the water before disassembly.
- Identify the exact replacement part.
- Avoid scratching the sealing surfaces.
- Remove the old ring carefully.
- Clean accessible debris from the component.
- Apply only manufacturer-approved lubricant when required.
- Reassemble the faucet in the correct order.
Do not use an O-ring merely because it appears to be approximately the same size.
A small dimensional difference can prevent a complete seal.
How Can You Test the Faucet After Repair?
A repaired faucet should stop water completely when the handle is closed. It should also operate smoothly when water is restored.
Testing is particularly important after cartridge replacement because an incorrectly installed part can affect normal operation.
Follow these steps:
- Confirm that all components are reassembled.
- Open the faucet handle.
- Restore the supply valves gradually.
- Allow trapped air to leave.
- Check the water flow.
- Test the hot and cold settings.
- Close the handle normally.
- Watch the spout for several minutes.
- Inspect the handle area.
- Check beneath the sink for leaks.
A small amount of remaining water may drain from the spout immediately after shutoff.
Continued dripping suggests that the valve is not sealing correctly.
What Mistakes Should You Avoid During Faucet Repair?
Faucet repair can become more difficult when components are forced or the wrong replacement parts are installed.
Avoid these mistakes:
- Disassembling the faucet before shutting off its water supply.
- Forcing a seized handle.
- Scratching precision sealing surfaces.
- Installing a cartridge with the wrong model number.
- Reusing visibly damaged washers.
- Applying incompatible lubricant.
- Overtightening faucet components.
- Ignoring leaks beneath the sink after reassembly.
Never assume that a replacement cartridge is compatible simply because it resembles the original.
Manufacturer specifications should determine component selection.
How Much Does It Cost to Fix a Leaky Faucet?
Most simple repairs cost relatively little in replacement parts. Professional labor increases the total when the repair requires disassembly or additional diagnosis.
The following figures reflect reported U.S. costs for 2026.
| Repair Item | Typical Cost |
|---|---|
| Rubber washer | 2–5 |
| O-ring | 1–5 |
| Replacement cartridge | 10–100 |
| Valve seat | 5–10 |
| Professional bathroom faucet repair | 60–200 |
| Professional kitchen faucet repair | 100–250 |
| Broader professional faucet repair | 100–400 |
Professional costs depend on the faucet design and the amount of labor required.
The lowest-cost repair is often replacing a single worn component when the faucet body remains in good condition.
When Should You Call a Professional?
Professional assistance becomes appropriate when the faucet cannot be isolated safely or the internal components cannot be removed without risking damage.
Consider professional repair when:
- A shutoff valve is seized or damaged.
- The correct cartridge cannot be identified.
- Internal components are severely corroded.
- The faucet body is cracked.
- A correctly installed replacement does not stop the leak.
- Water is leaking from inaccessible connections.
- Repeated repairs have not restored normal operation.
Replacement becomes more relevant when the faucet body or valve assembly is damaged beyond practical repair.
How Can You Prevent Another Faucet Leak?
Faucet maintenance should focus on reducing unnecessary mechanical stress and identifying developing problems early.
Useful habits include:
- Close handles using normal pressure.
- Clean accessible mineral deposits.
- Avoid forcing stiff faucet controls.
- Inspect handles for moisture.
- Check supply connections periodically.
- Address persistent dripping promptly.
- Use the correct replacement components.
The EPA estimates that a faucet dripping once per second can waste more than 3,000 gallons annually. Early repairs can therefore reduce unnecessary water consumption.
Conclusion
To fix a leaky faucet, identify the faucet type before purchasing replacement parts. Shut off the water and relieve pressure before disassembly. Replace worn components using the manufacturer's instructions and test the faucet after reassembly.
A persistent leak may indicate damaged valve surfaces or an incorrect replacement component. When internal damage or inaccessible plumbing prevents a safe repair, professional assistance may be appropriate.
Frequently Asked Questions
Can I fix a dripping faucet myself?
Many accessible faucet repairs involve replacing a washer or cartridge. Follow the manufacturer's instructions and shut off the water first.
Why does my faucet still drip after replacing the washer?
The valve seat may be damaged or the replacement washer may not match the original component.
How do I know which cartridge to buy?
Identify the faucet manufacturer and model. Use its official replacement-parts information.
Can a faucet leak after cartridge replacement?
Yes. An incorrect cartridge or installation problem can prevent the faucet from sealing properly.
Should I replace the whole faucet when it starts leaking?
Not automatically. A replaceable internal component may resolve the problem without replacing the complete fixture.